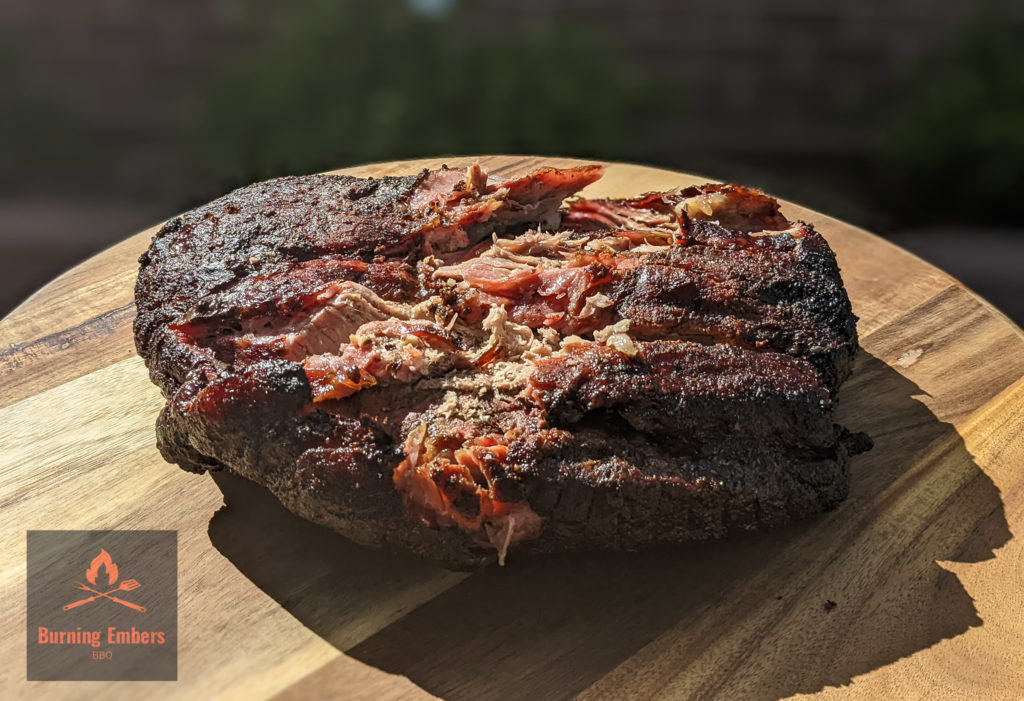
Pulled Pork collar
Before I really got into Low and Slow, I didn’t understand what all the fuss was about with Pulled Pork. I’m not saying I didn’t like it, but I’m also not going to say I’d go out of my way to get some. To me it seemed too juicy and soft, and not enough texture. I’m not a fan of the massive Pork Butt and super soft pork that you find in the middle. But like most things BBQ, there’s more than one way to it!
So I’ve experimented a bit and found I like using a Pork Collar cut for my pulled pork instead, and here’s the reasons why. Well if I’m honest, it’s one key difference that leads to many reasons. Confused? I’ll explain.
While both cuts share the same connective tissue and collagen that requires low and slow to break them down, the key difference is that the collar is much smaller and a tiny bit leaner. For me that means more bark vs non bark ratio, more of the meat is being kissed by the smoke, and the “inside meat” isn’t quite as soft (or dare I say it, mushy). So if you’re like me and you enjoy a bit more texture to your food, this method might just be for you!
If you need more meat than what a collar provides (this one came in at around 2.25kg or 5lb) then do two of them if you have the real estate in your smoker.
I’m smoking this pulled pork collar with Ironbark as my flavour wood. Ironbark to me is the Australian equivalent of Hickory; a great all-rounder for most meats, though pork will also be complimented beautifully by fruitwoods such as apple, plum or cherry. One thing you need to watch out with Ironbark is it burns hot, so be careful and don’t overload it.
method for smoking pork collar
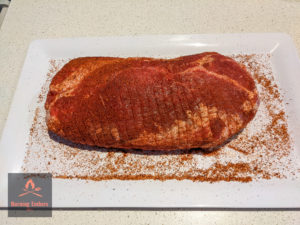
- To prepare this, I’ll lightly salt it the night before and let it dry brine overnight underneath some plastic wrap. First thing the next morning I’ll hit it with my all purpose pork and chicken seasoning then put back in the fridge while I fire up the smoker.
- Today I used my Kamado style cooker and aimed for a temp around 250f-275f (120c-135c). Setup for indirect cooking with your deflector plate on and a good amount of lump charcoal. I’m smoking this with Ironbark as my flavour wood.
- Once we’re up to temp, pop the pork collar in there, wire up your temperature probes and don’t peak at it for at least two hours. Also pop in three tablespoons of pork lard (per collar) into a container and into the smoker. Smoked pork lard is like beef tallow, and we’ll use it to keep the collar moist and it rests and provide an amped up smoky flavour.
- After two hours, spray the collar with 50/50 ACV/water mixture every 30/45 minutes. Move and turn your collar now and after every other two hours so it’s getting nice even cooking.
- Keep cooking and spraying and rotating all the way until your probe is measuring 195f. Then keep checking for tenderness with a skewer or instant read thermometer every 20 minutes until it’s probe tender all around. Probe tender feels like sticking a probe in warm butter, with little resistance being felt.

- When your pork collar is getting close to probe tender, get something ready to hold your meat at a warm temperature. This might mean a cooler (or as us Aussie’s like to say, an “esky”) or an oven running at a low temperature (around 170f/75c). If you’re using a cooler, pre-warm it (I use a hot water bottle) and have a towel or two in there for extra insulation.
- Once you’re at probe tender all around (likely temp will be around 205f/96c), take it out of the smoker and let sit for 5 minutes uncovered. During the wait, lay out two sheets of butcher’s paper overlapped about 1 metre long on a table and above an old towel. The width of the two sheets of butcher’s paper needs to be wide enough to put the collar on width ways with 6 inch/15cm each side to wrap the sides in.
- Pour around a third of the smoked lard on the butcher’s paper around 20cm/8 inch from the end where you’ll put the collar. Then place the collar on the butcher’s paper. Pour another third of the lard on top of the collar.
- To wrap, firstly wrap the 20cm/8 inch at the start of the paper over the collar. Fold in both the sides over the edges of the collar and fold along the length of the collar. Then wrap rolling the collar along the length of the paper. Place in your cooler or oven to hold its temp.
- Hold your collar for at least 1.5 hours in your cooler or oven, but you should be able to keep it appropriately warm for up to 4 hours in a cooler. You can hold longer than this (I’ve held in a 170f/75c oven for 12 hours with success) but make sure it stays above the “meat danger zone” temperature of 140f/60c.
- To get ready to serve your pulled pork collar, I simply shred with two forks until the entire collar is shredded up. Put in a large mixing bowl and add a generous amount of the pork/chicken rub we used previously as well as the remaining smoked pork lard (you may need to heat up the lard in the microwave if it’s solidified.) Mix well and it’s ready to serve.

All up, I allow 12 or so hours from collar on the smoker to shredding and serving. At around 250f/275f it will normally take between 8-10 hours on the smoker with some rest time. You can accelerate the cook by wrapping in butcher’s paper at around 170f rather than waiting until it’s done; this might save an hour or two on the smoker but the bark won’t be quite so “barky”.
Ingredients I used
(Each Pork Collar makes around 1.4kg/3lb of pulled pork)
- 5 lb (2.25kg) Pork Collar
- Salt (for dry brine)
- All Purpose Pork and Chicken Rub
- Apple Cider vinegar and water (for spritzing)
- 3 tablespoons of pork lard
TOOLS AND EQUIPMENT I used
- Akorn Jr Kamado Grill
- Char Griller lump charcoal
- Ironbark wood chunks (Hickory or Fruit woods also work well)
- Ozito Electric Charcoal starter
- Inkbird 1HT-1 instant read thermometer
- Spritz bottle
- Butcher’s Paper